Make a high end UCS Server for fast build
by Wenwei Weng
Cisco IOS has been growing significantly over the last ten years. The source code is reaching 10GB, and build time is taking long depending on the build machine capacity. To make development time efficient, it is critical to cut down the image build time. This week, I spent some time to make a high end of UCS server for IOS image build.

What parts needed: the below picture shows required parts:
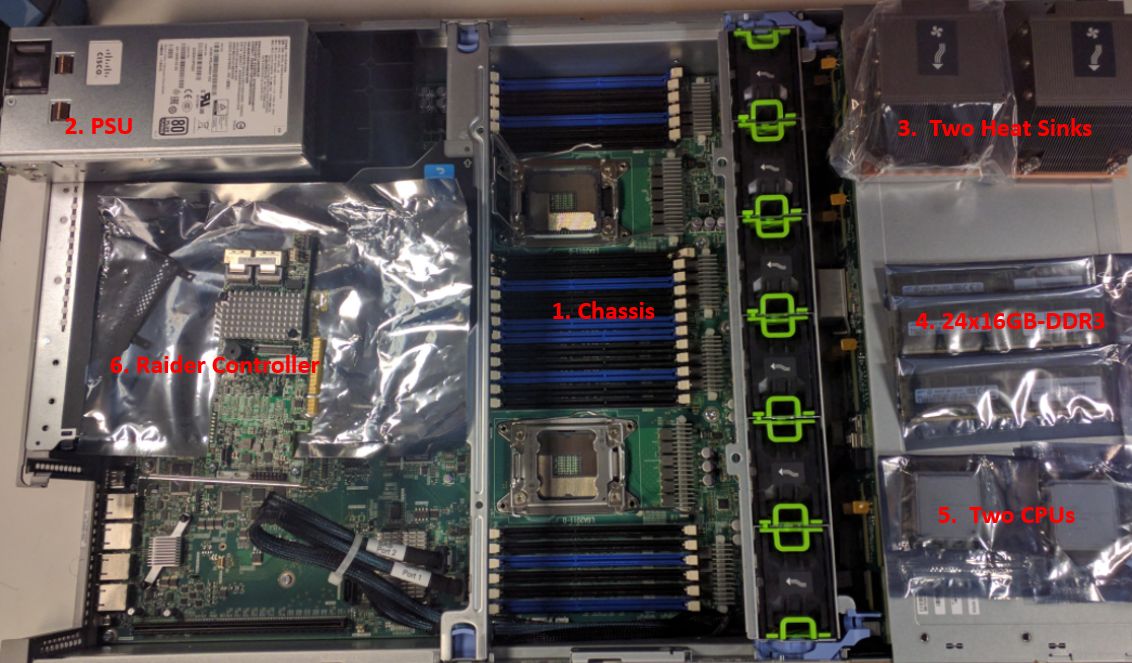
- Chassis: UCS 240 M3
- Power Supply Unit (PSU)
- Two Heat sinks for CPU heat dispatch
- 24x16GB DDR3 RAM
- Two Intel Xeon E5 2697V2 CPU
- Raid Controller: LSI 9271-8i MegaRaid
- 3x2TB HDD
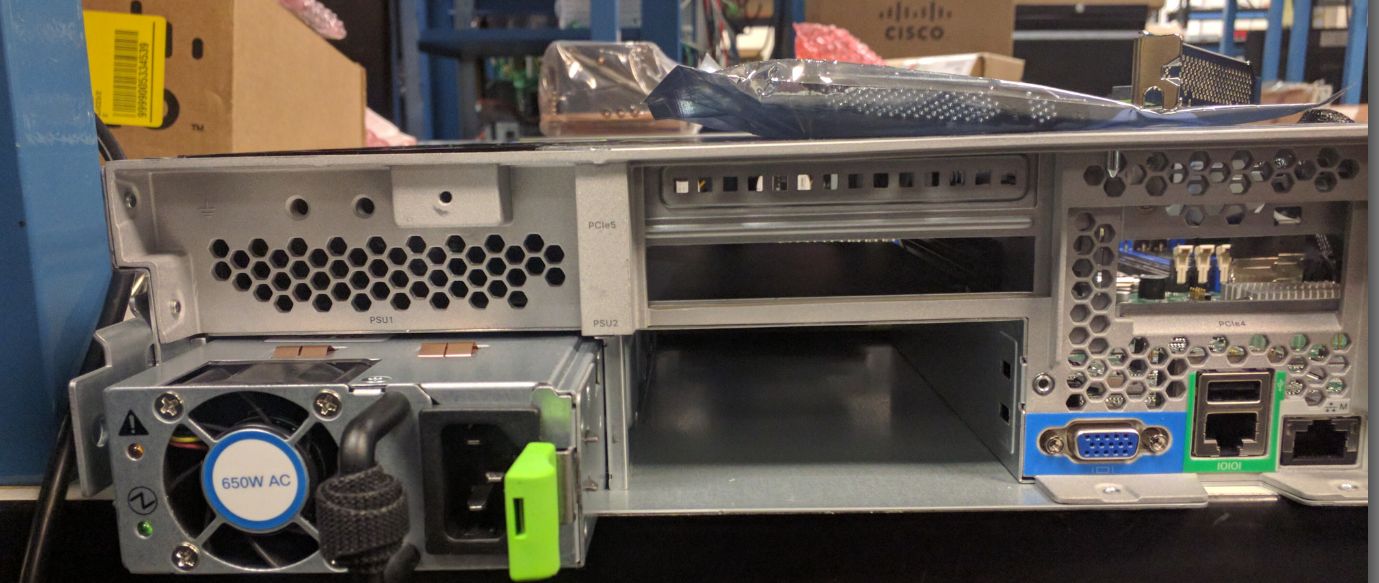
Install PSU
UCS 240 M3 chassis has two PSU slots for redundancy. However I install only one PSU.
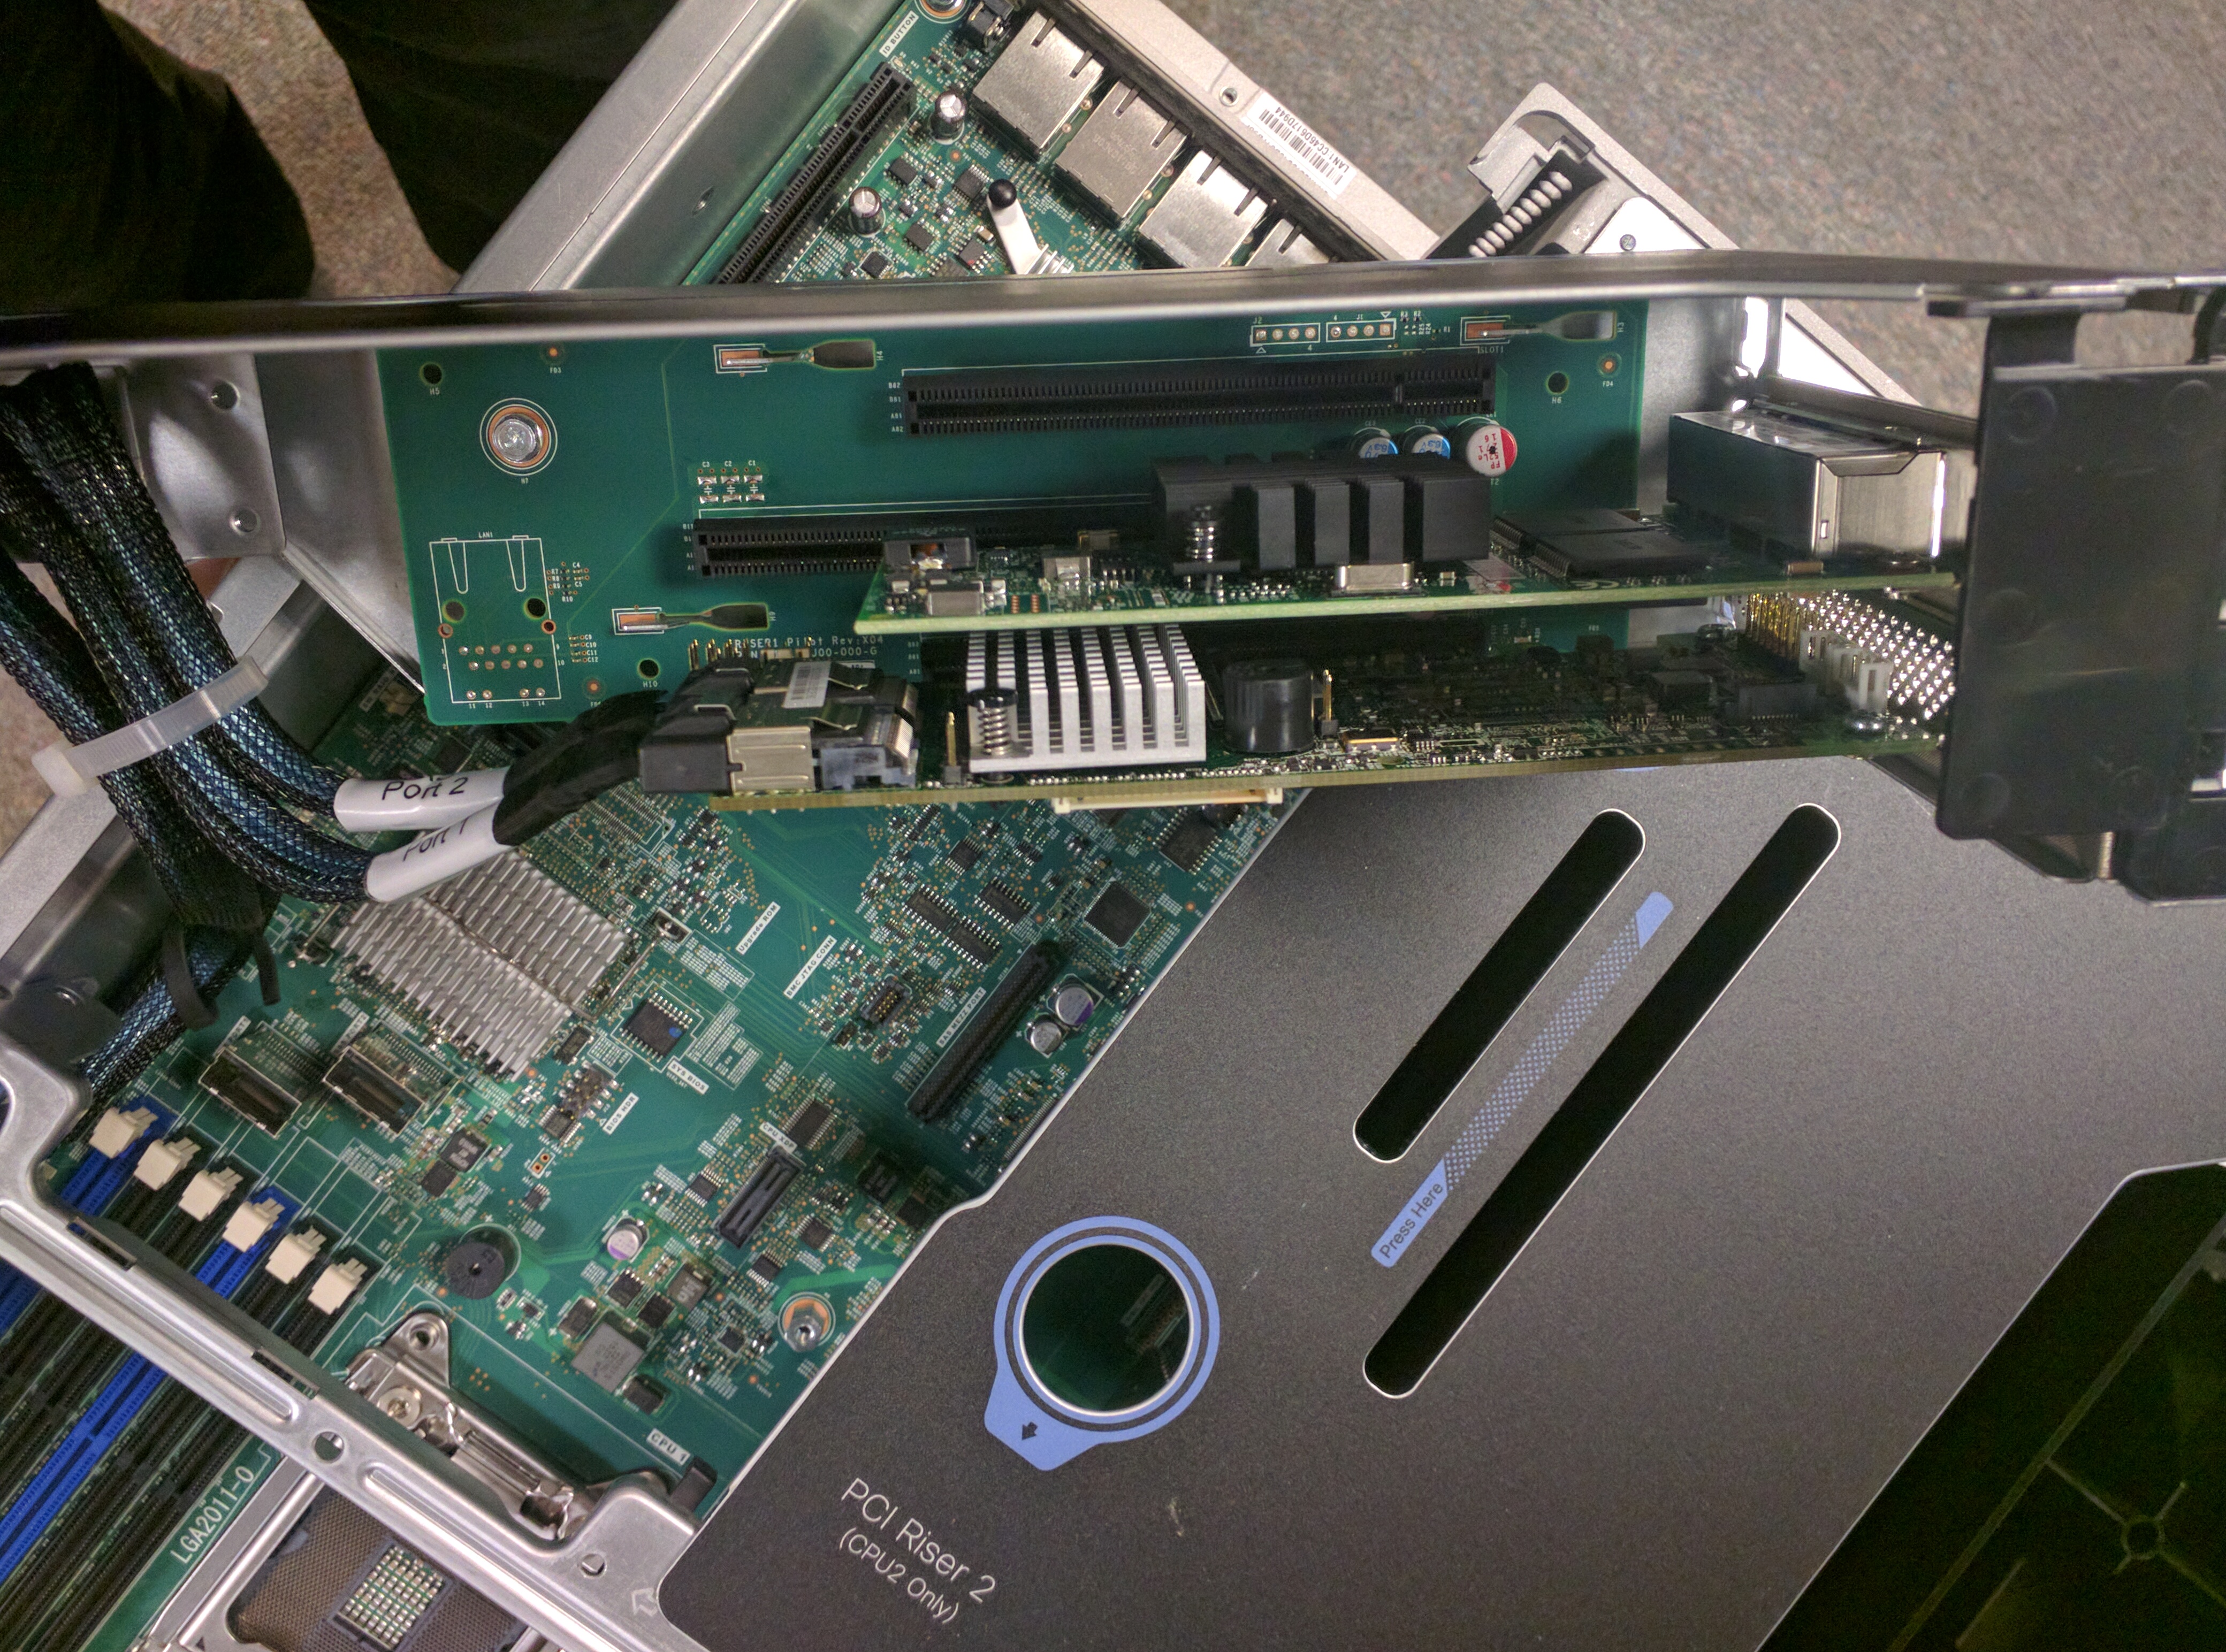
Install Raid Controller LSI 9271-8i MegaRaid
UCS 240 M3 chassis comes with on-board raid controller, somehow it doesn’t work well. Raid controller is a way of virtualize hard disk drive, it provides different level of disk redundacies (R0, R3, R5, R6). For UCS, it needs to be installed in one of PCI riser.Inside PCI riser, I also install a 4 ports GE NIC cards
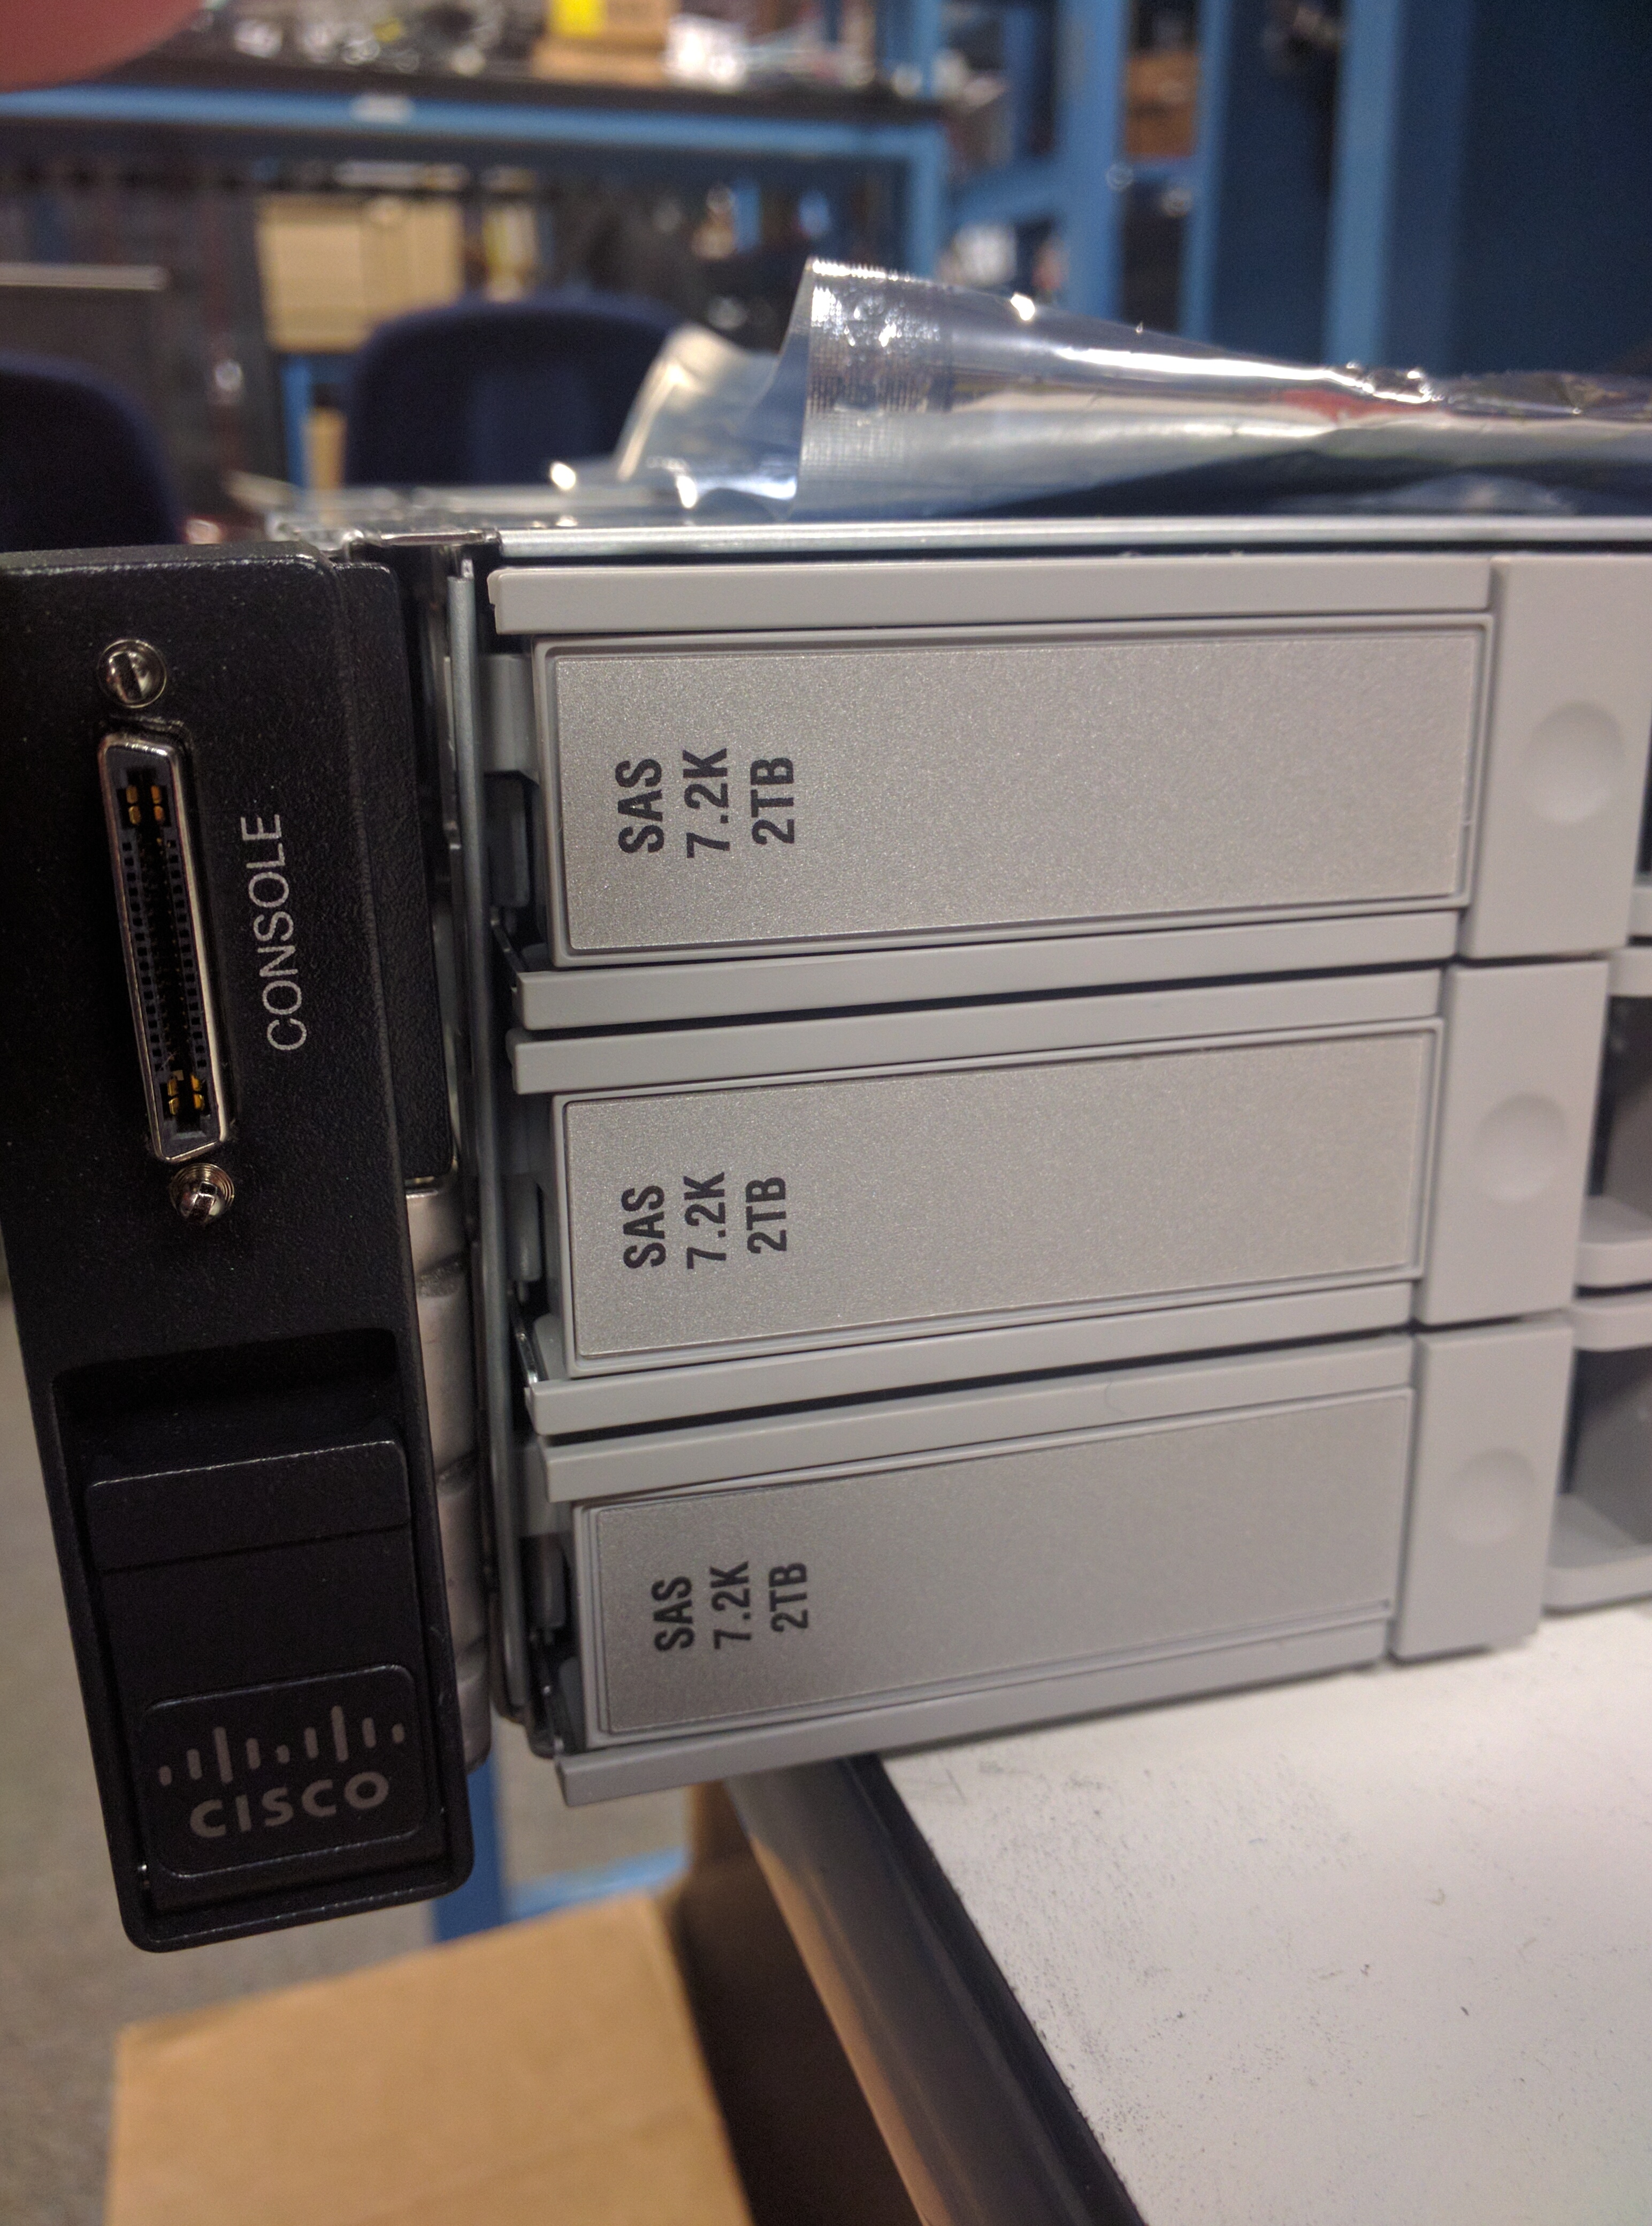
Install Hard Disk Drive
UCS 240 M3 has 12 slots for hard disk drive. In this box, I install 3 2TB HDD.
Install CPU
The chassis has two CPU sockets. I have two Intel Xeon E5 2697V2. Each one has 12 physical cores. With hyperthreading enabled, there are total 48 virtuals cores available.

Install DDR3
The chassis has 24 slots for DDR3 DRAM (Channels: A, B, C, D, E, F; each channel has three banks)
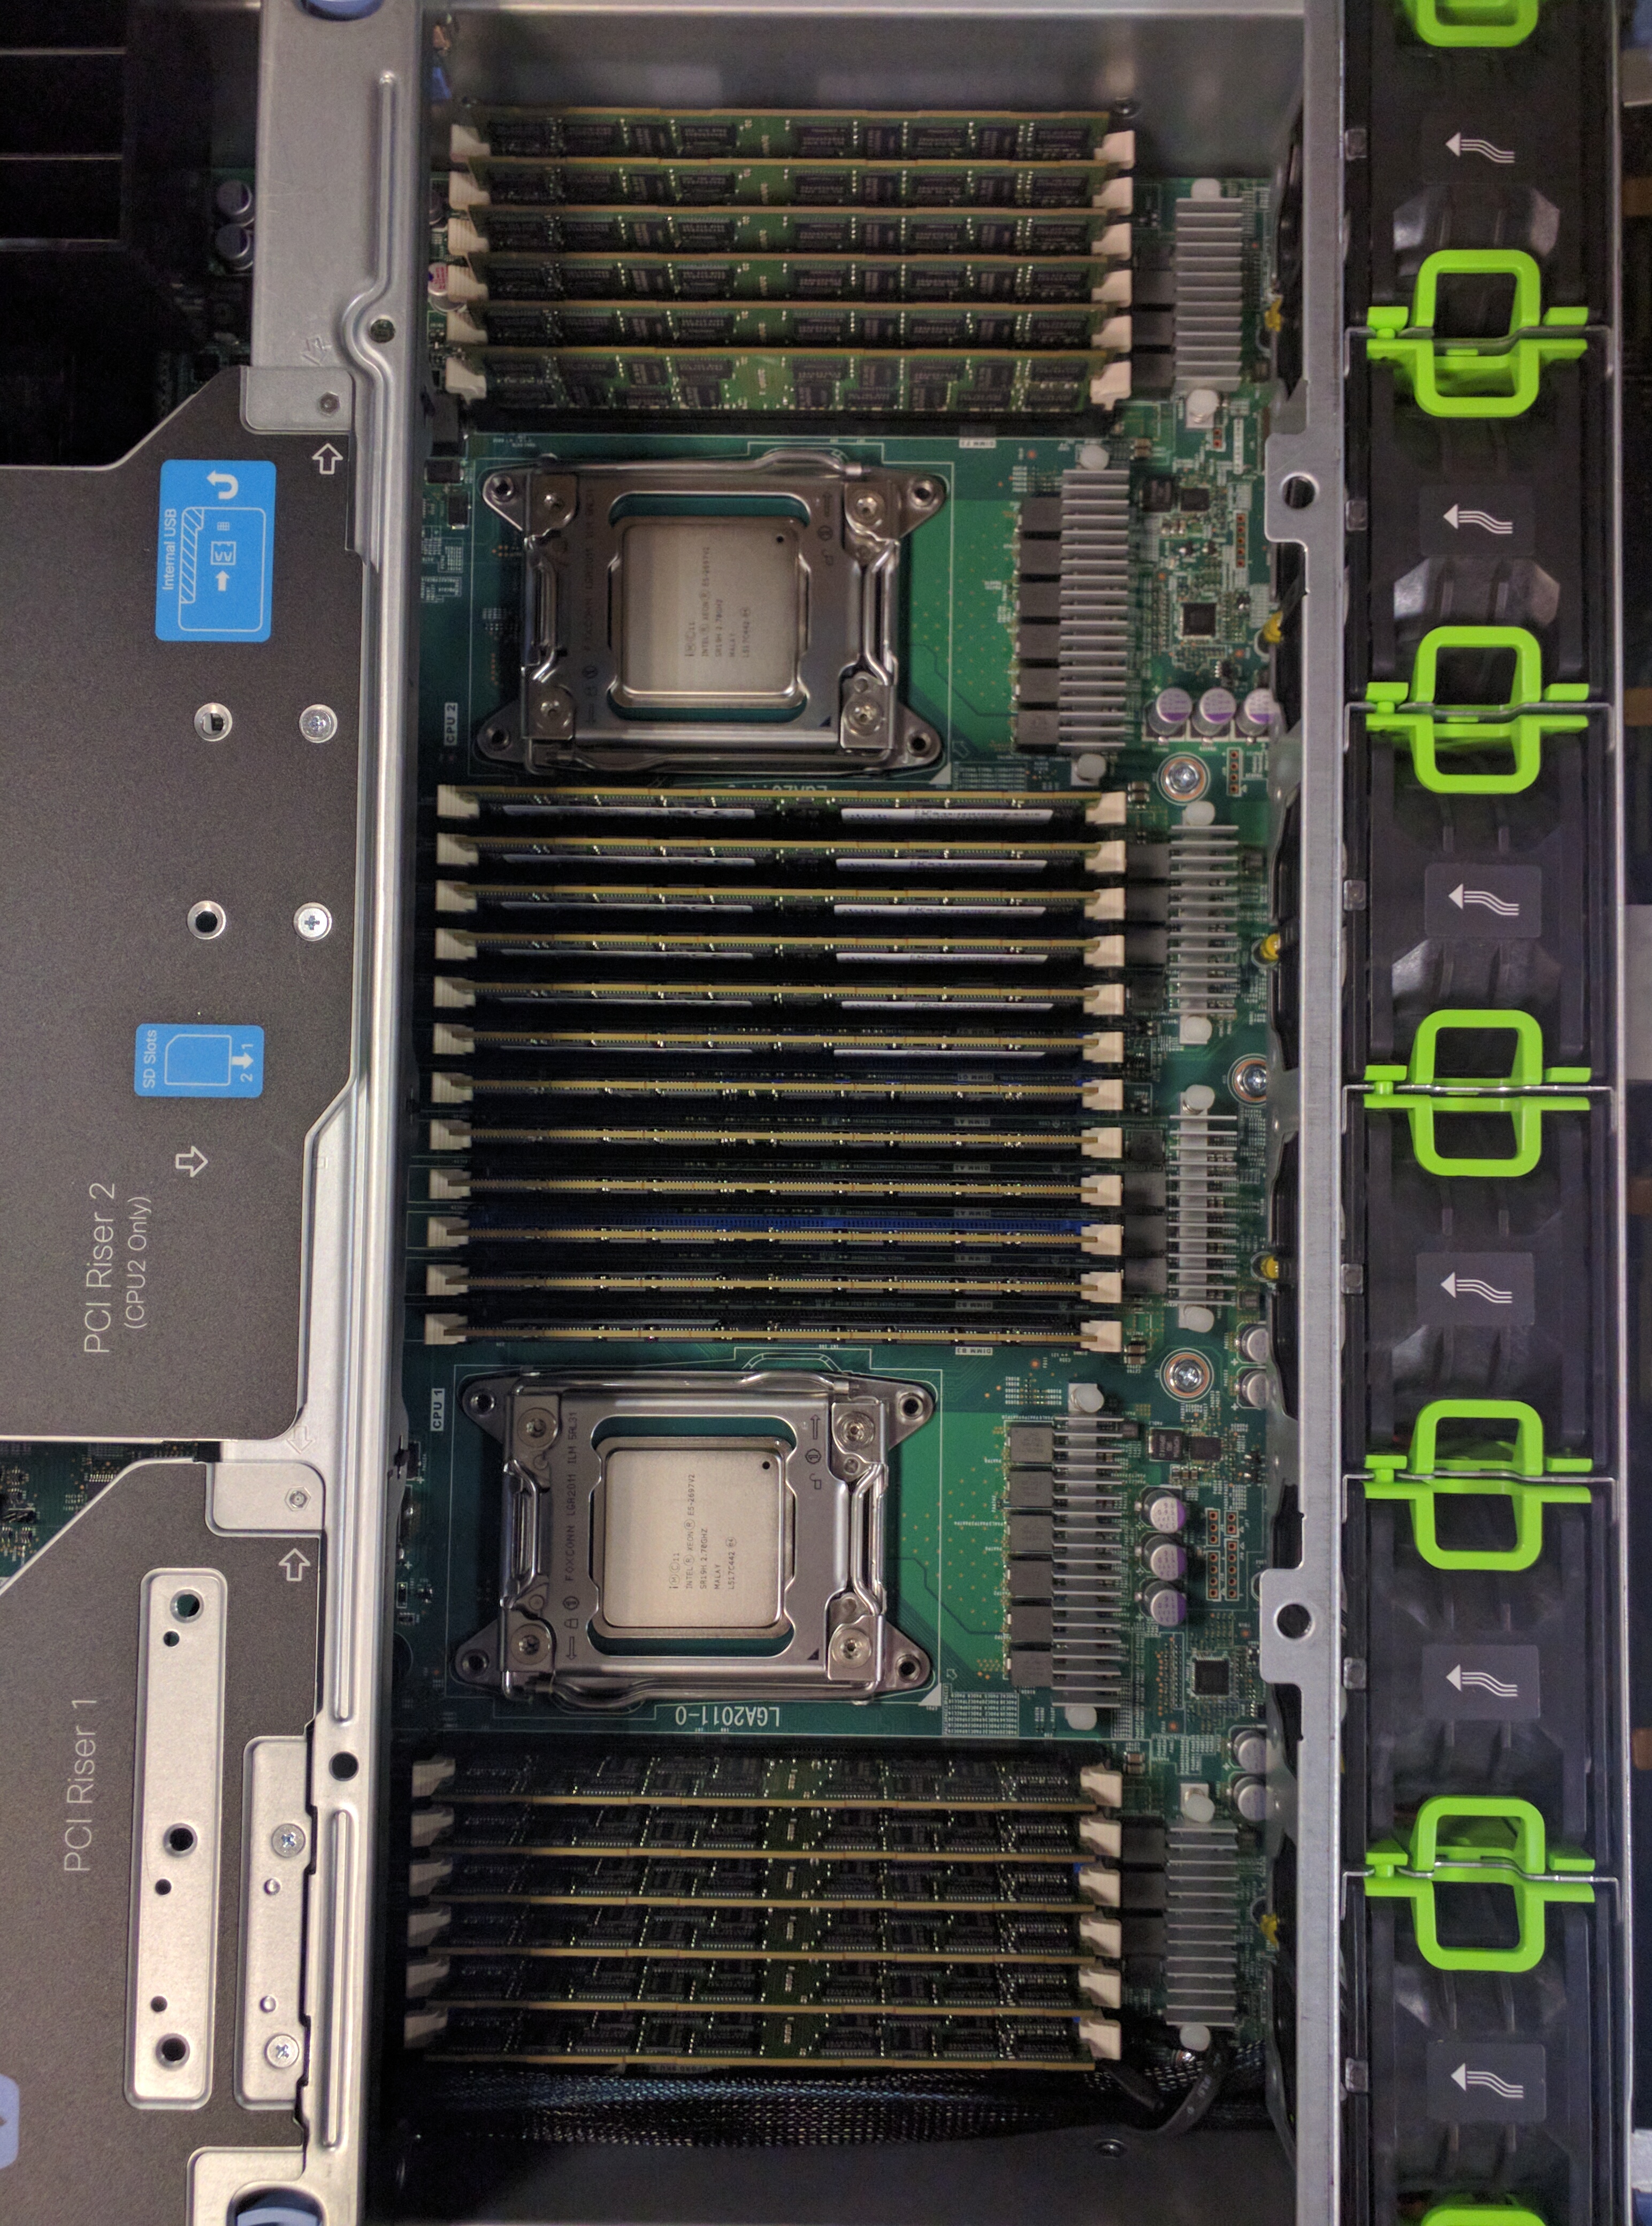
Install head sink
Heat sink is required for each CPU. before installing heat sink, make sure to apply grease evenly on the top surface of processor.
Now hardware is ready. In order to work, there are two low level software configuration required:
Enable Raid controller and 4 Ports NIC card inside BIOS
During box boots up, press F2 to enter BIOS, and go to “Advanced” menu, then PCI configuration to enable Raid Controller (slot#3) and NIC card (Slot#2)
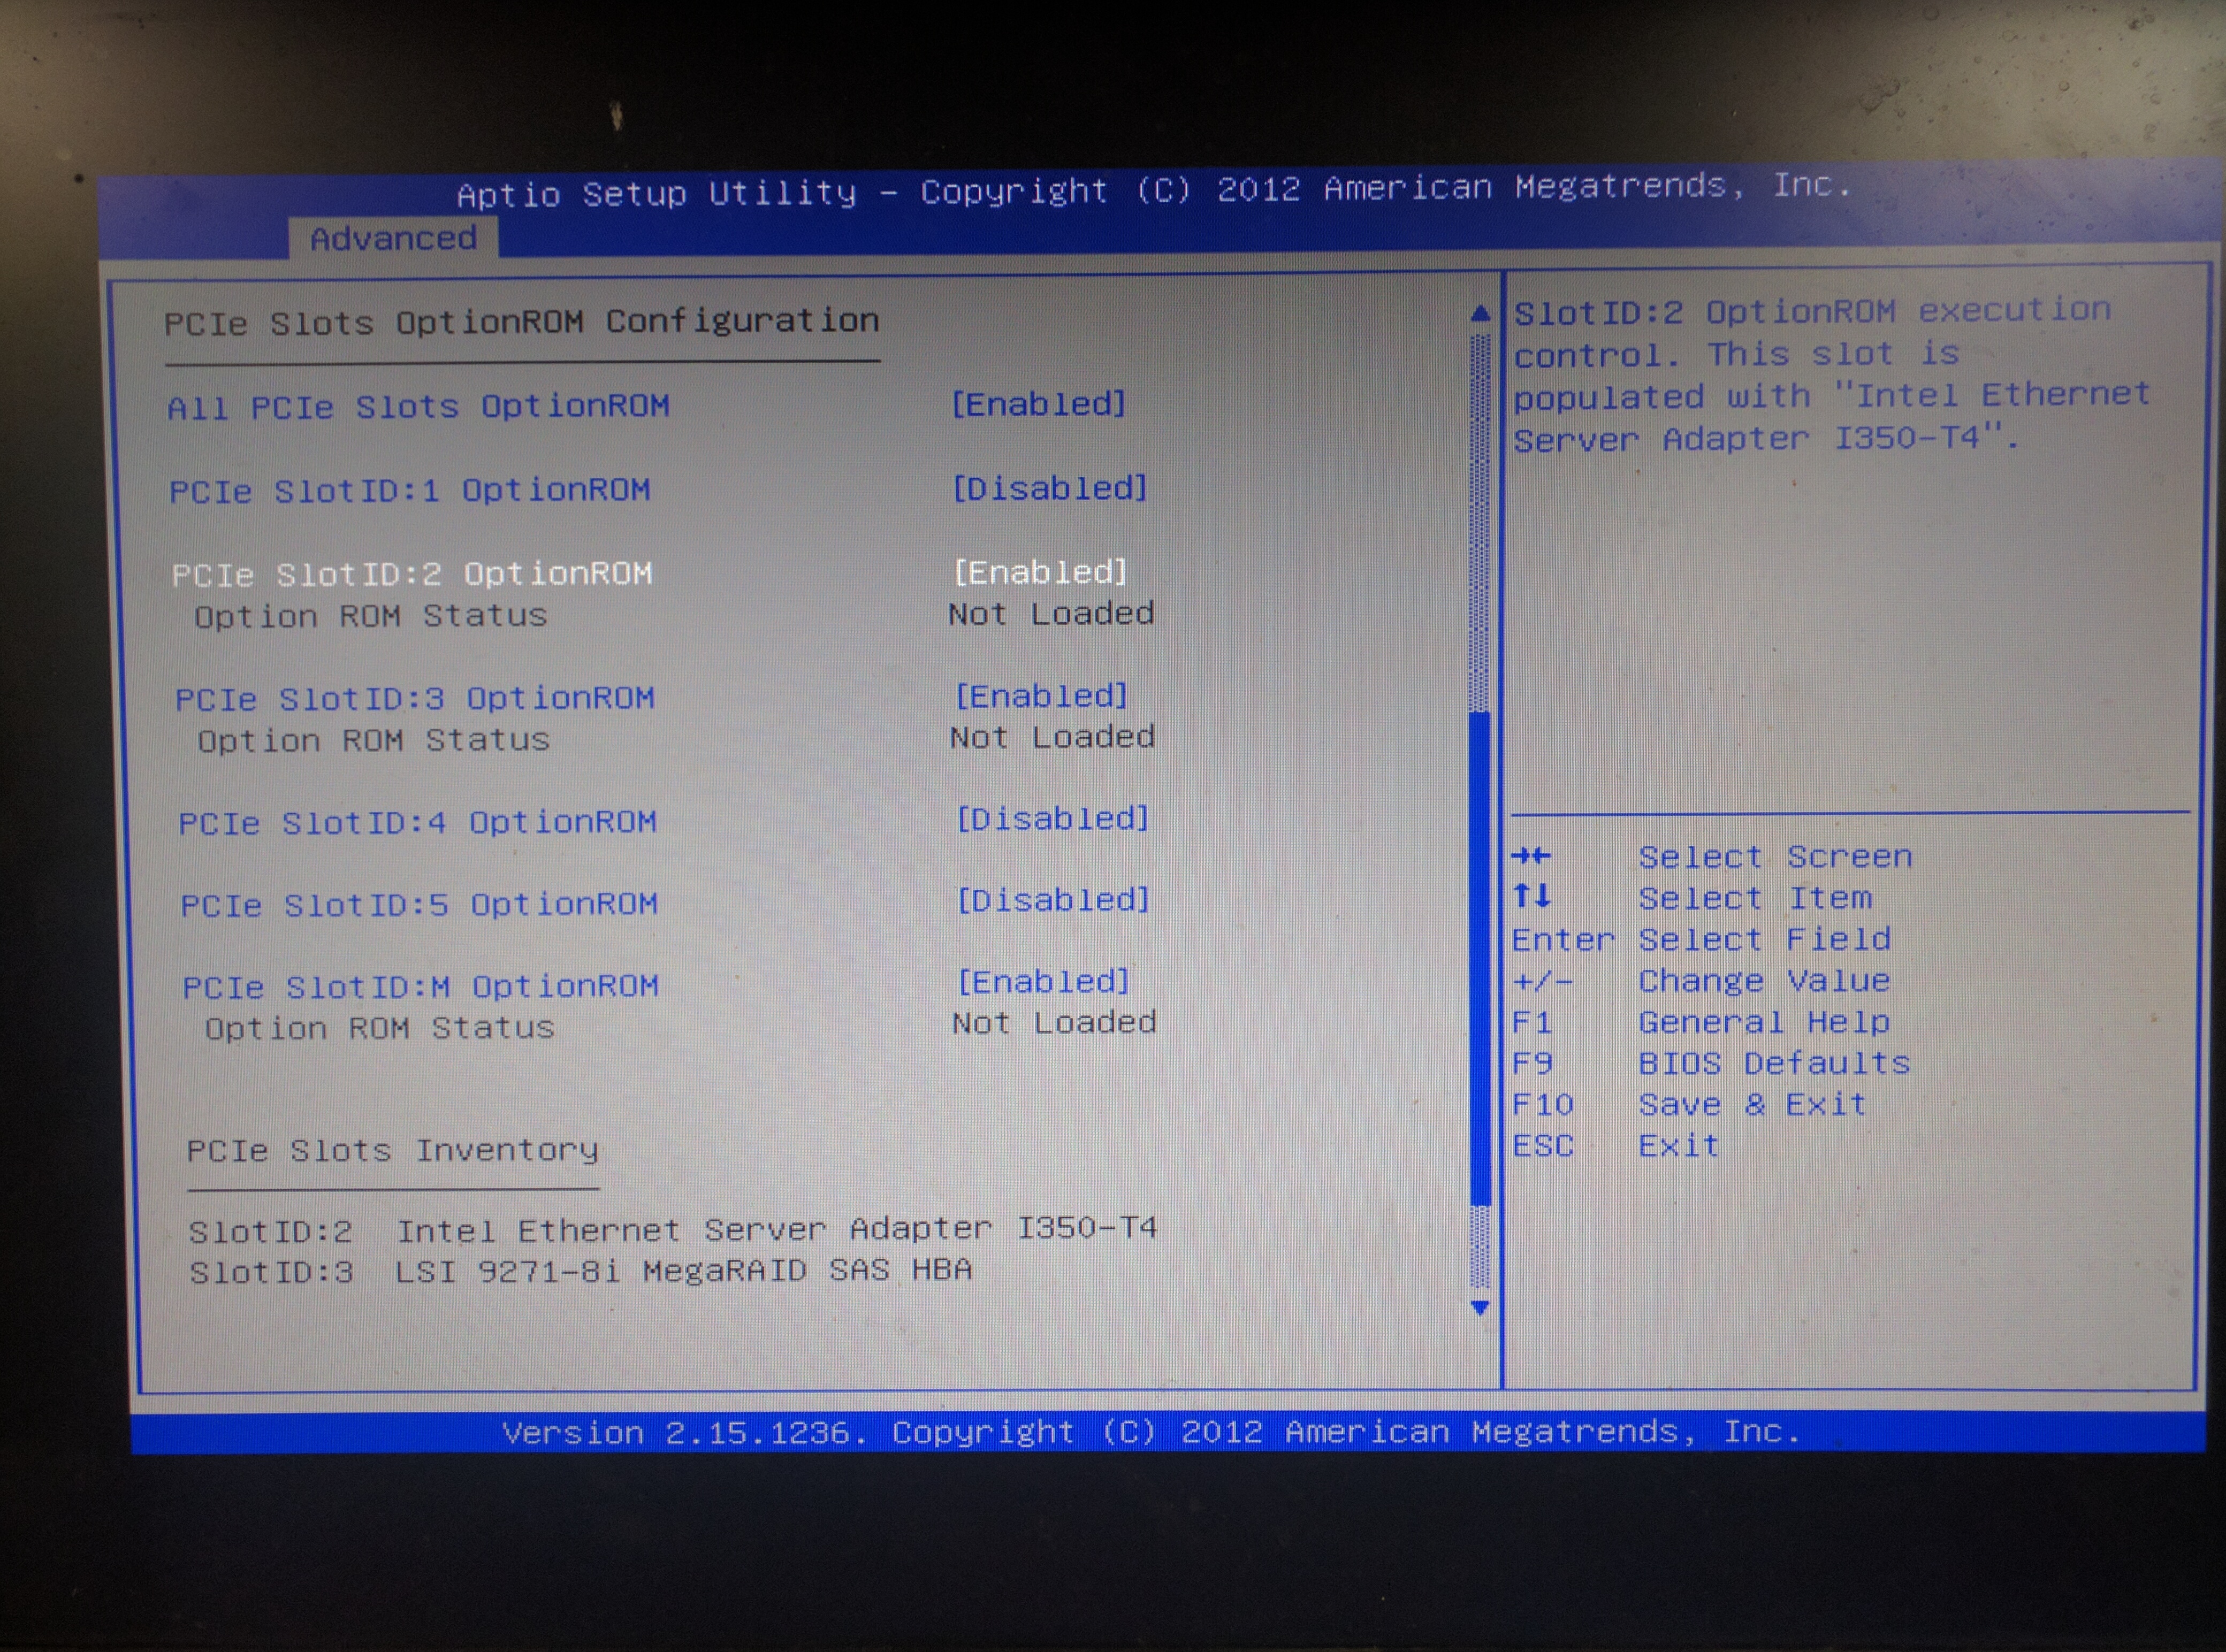
After configuration is done, press F10 to save and exit, and reboot box.
Configure virtual drive by Raid controller from webBIOS
After Raid controller is enabled, during boot up, it will come with a stage to let you press “Ctrl+H” to enter into WebBIOS to configure Raid controller. Please use the configuration wizard to follow steps.
After All those hardwork, the box is ready to install linux !!!
Subscribe via RSS