Ethernet throughput testing using Spirent
by Wenwei Weng
There are some Linux open source tools like iperf, netperf can be used to generate ethernet tarrfic for throughput testing. Those tools can get a ballpark number only. There are vendors like IXIA, Spirent, which design the dedicate measurement tools. For the last few days, as I’m evaluating the different software architecture for the next routing platform I’m going to work on this year, I used Spirent SPT-9000A to perform ethernet throughput testing.
Testing Setup Topology
Before we get into how to use Spirent to do the testing, we must introduce the setup topology below:
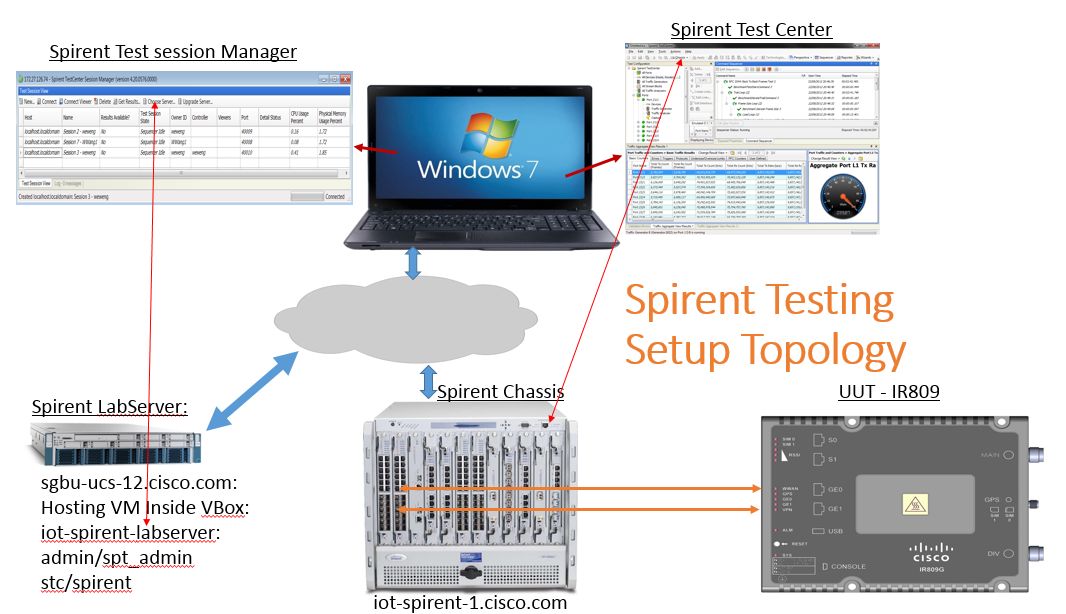
1. Spirent chassis
This is the heart of testing setup. It has an ethernet interface for management, which is used to comminucate to Spirent test center application, Spirent lab server. It mutiple slots to host mutiple testing modules. Each slot has multiple ports, which will generate/receive ethernet traffic.
2. Laptop/Desktop running Windows OS
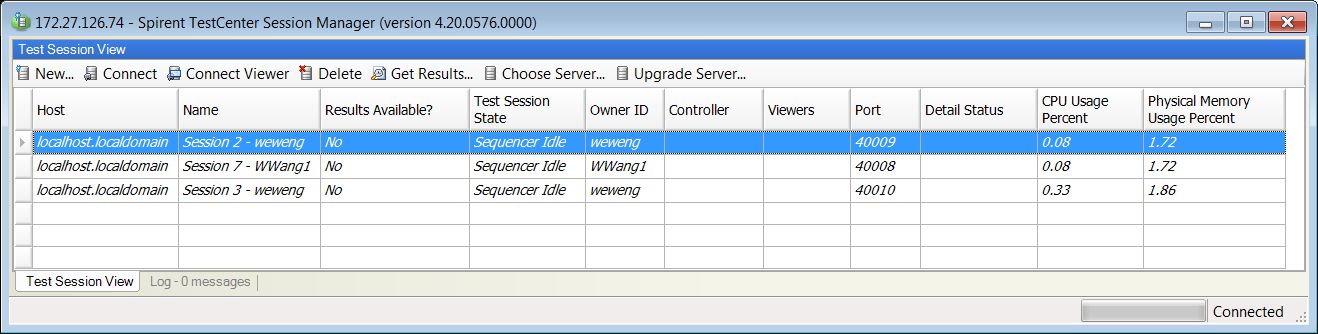
It needs to have “Spirent TestCenter” application suites installed under Windows. It includes applications:
3. Lab Server
This is a Fedora virtual machine from Spirent. This virtual machine is hosted inside VirtualBox, which runs inside UCS server, which has Redhat Enterprise Linux 6.8 running.
4. Unit Under Testing (UUT)
UUT’s ethernet interfaces will be connected to the respective ports in one of module inserted in one slot.
There are two ways to run testing:
Basic concepts for Spirent test center application:
Chassis:
This means the Spirent test physical box, which has an ethernet interface which is for Spirent Test Center or Lab Server to communicate to. You need to know the IP address of the Chassis. After launch the application, the first thing you need to do is to connect to chassis by clicking “Chassis” toolbar button, or menu “Action->Chassis”, then you need input Chassis IP address.
Port:
The modules (generates testing traffic) are inserted into respective slots. Each module has many ports (e.g. 12 ports). These are physcial ethernet ports, either with RJ-45 or SFP as connector. After connected to Chassis, you can reserve the ports allocated for your testing. The selected ports will be shown under “All Ports” folder in the left navigation tree.
Device:
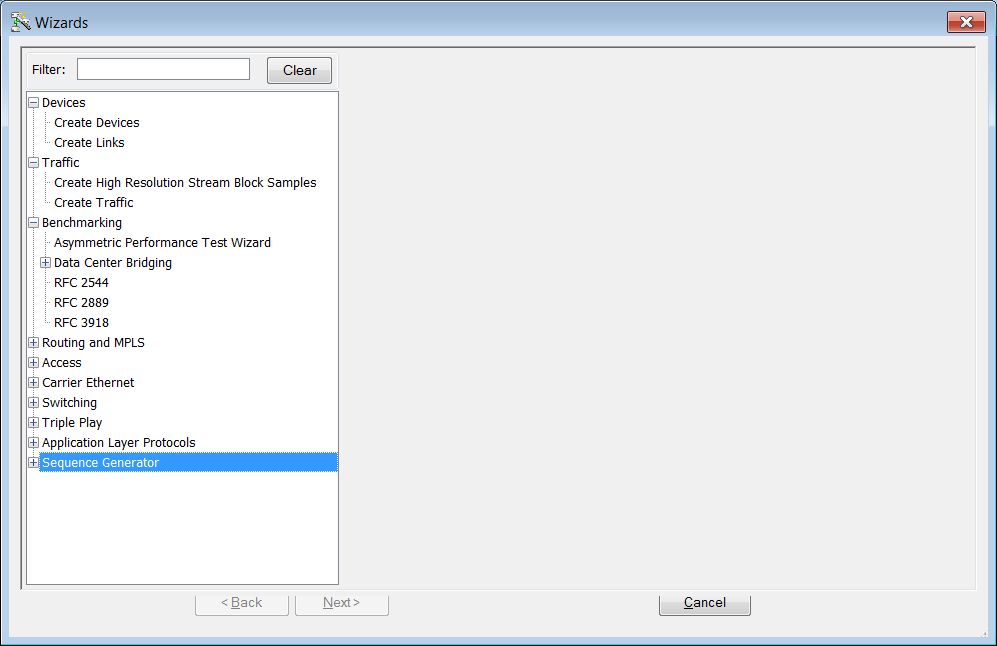
The device is a logical entity created inside Spirent Test Center application to emulate different host, router etc. Each port can have mutiple devices. However I use one device per port only to keep it simple. The device can be created by “Wizards” -> Devices -> Create Devices. Here you need specify the device IP address, gateway IP address etc. The created devices will be shown under “All Devices” folder in the left navigation tree.
Traffic stream:
The traffic stream is to define how the testing traffic is to be generayed, from which source device to destination device, plus packet size, pattern. The traffic can be created by “Wizards” -> Traffic -> Create traffic. The created traffic streams will be shown under “All Stream Blocks”
Traffic generator:
After traffic stream created, it will be assigned to respective ports. From the traffic generator, the traffic load can be specified.
Benchmark testing:
There are standards like RFC 2544, RFC 2899, which defines how to perform benchmark testing. Spirent supports that.E.g. Under “Wizards->Benchmarking-> RFC 2544”. This can simply the testing a lot. It also let you create device, traffic, define benchmark testing traffic range etc.
Demo
Please watch the following two videos for actual testing steps using Spirent Test Center Application.
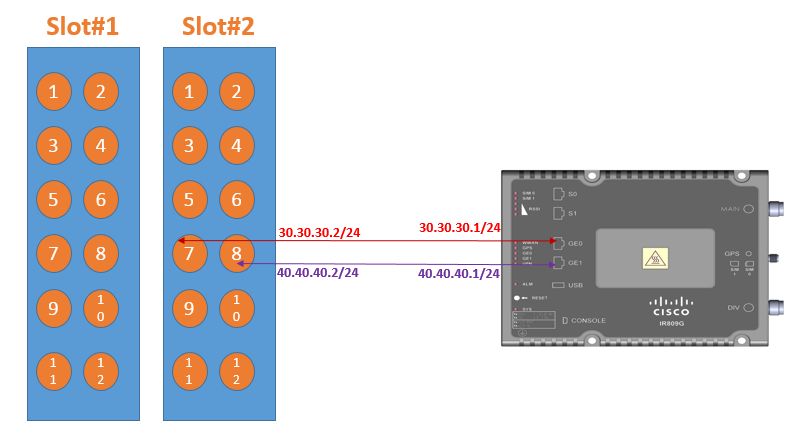
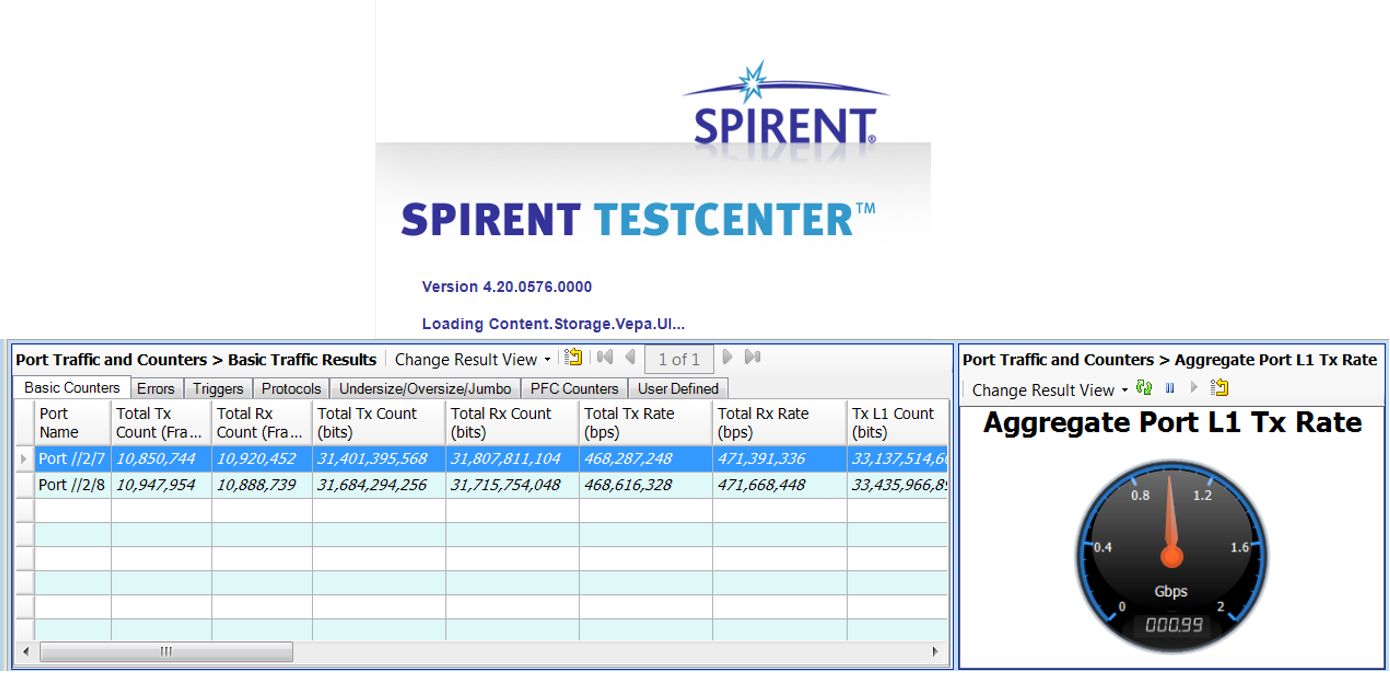
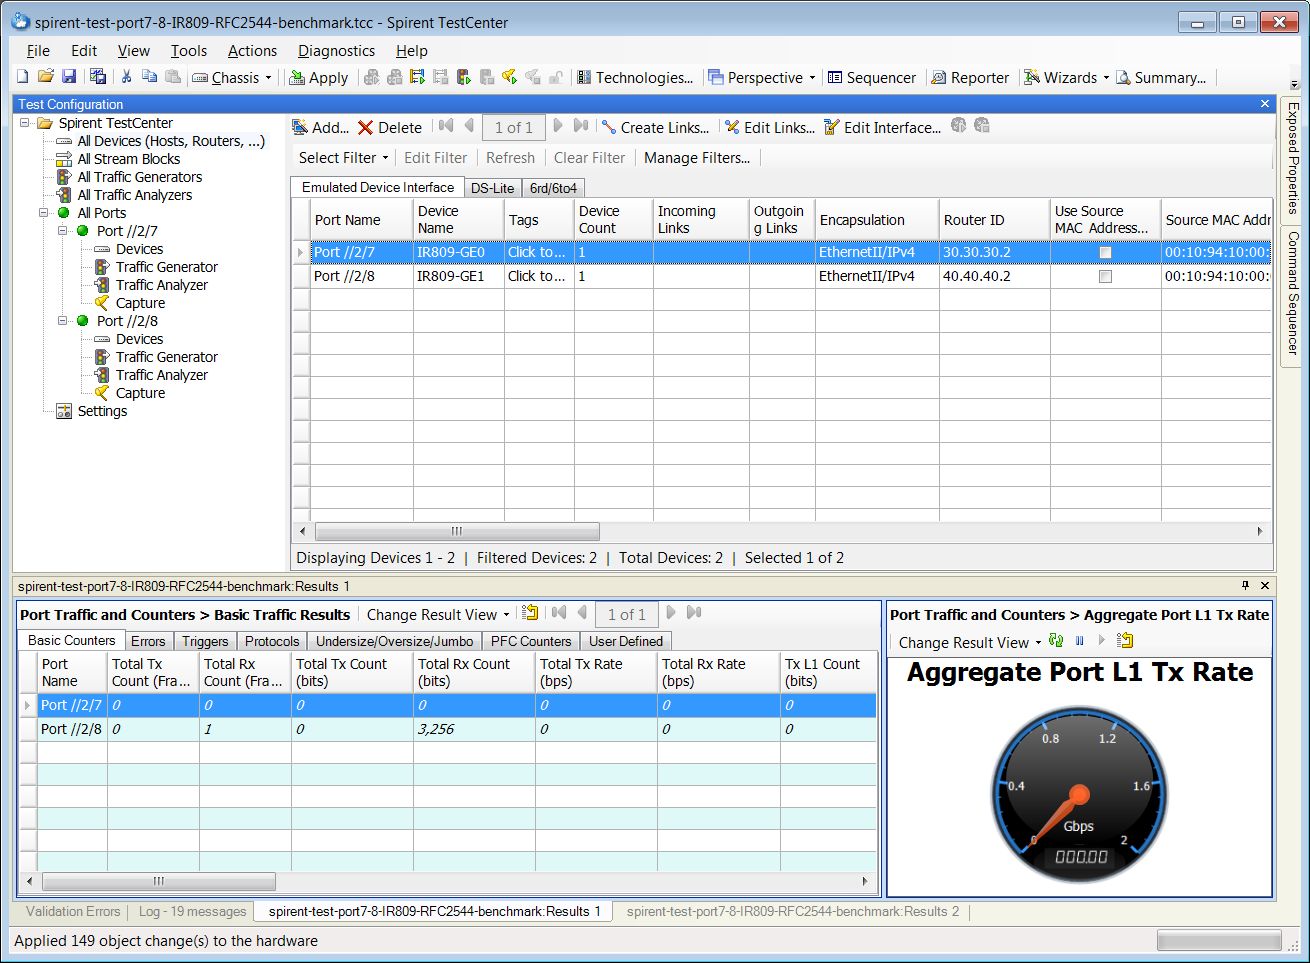
Perform testing by pumping 700mbps with packet size 1024 bytes from Spirent port 7 to port 8, bi-directions.
Port 7 (IP address: 30.30.30.2/24) is connected to IR809 GE0(IP address: 30.30.30.1/24);
Port 8 (IP address: 30.30.30.2/24) is connected to IR809 GE1 (IP address: 40.40.40.2/24)
Perform RFC 2544 Benchmarking testing by starting with 700mbps with packet size 1024 bytes and IMIX from Spirent port 7 to port 8, bi-directions.
Enjoy!
Subscribe via RSS